
Water flow sensors are integral components in many water systems, from residential plumbing to industrial applications. The SMWF 0.5 is a widely used sensor known for its precision in measuring water flow rates. However, like any mechanical device, it can develop issues over time, including leaks. A leaking water flow sensor not only disrupts the system’s functionality but can also lead to water damage and inefficiencies if not addressed promptly. In this article, we will explore the causes of leaks in the SMWF 0.5 water flow sensor, how to diagnose the problem, and provide step-by-step instructions on repairing it.
Understanding the SMWF 0.5 Water Flow Sensor
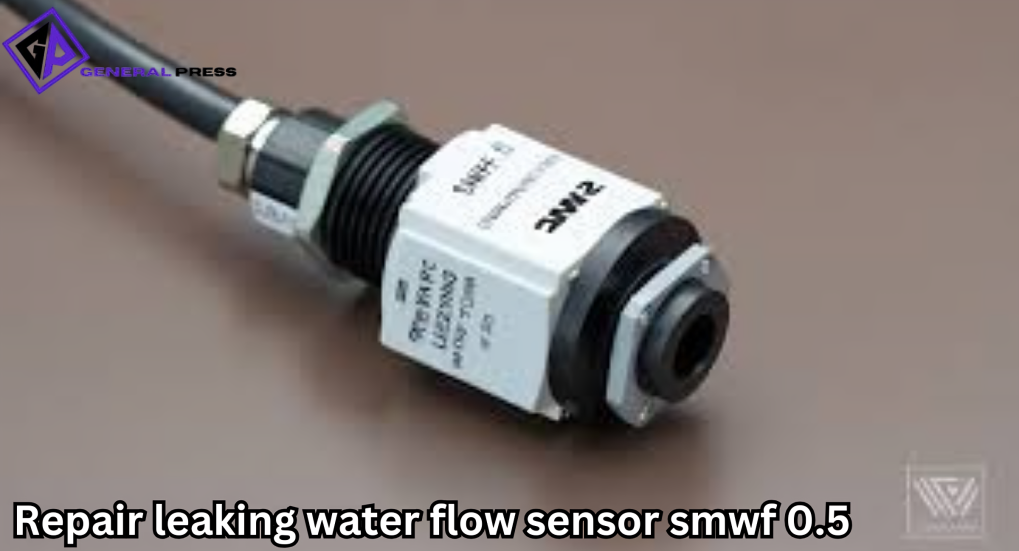
The SMWF 0.5 is a compact and efficient sensor designed to measure water flow rates in small-scale systems. It typically features a turbine mechanism inside that rotates as water passes through, generating electrical signals proportional to the flow rate. The sensor is constructed with durable materials like plastic and metal, ensuring its longevity and reliability under normal operating conditions.
Despite its robust design, the SMWF 0.5 is susceptible to wear and tear, improper installation, and environmental factors that can lead to leaks. Identifying the root cause of the problem is the first step toward repairing it.
Common Causes of Leaks in SMWF 0.5 Sensors
Also Read: Exploring RaterPoint: Revolutionizing the Way We Evaluate
- Loose Connections: Over time, the fittings connecting the sensor to the water supply lines may loosen, causing water to seep out.
- Cracked Housing: Prolonged exposure to high pressure, temperature fluctuations, or physical damage can result in cracks in the sensor’s housing.
- Worn Seals or O-Rings: The seals or O-rings inside the sensor may degrade over time, leading to leaks at the joints.
- Debris Build-Up: Accumulated debris inside the sensor can obstruct the water flow and increase pressure, potentially causing leaks.
- Improper Installation: Incorrect alignment or overtightening during installation can compromise the sensor’s integrity.
Tools and Materials Needed for Repair
Before you begin repairing the leaking water flow sensor, gather the following tools and materials:
- Adjustable wrench
- Screwdriver set
- Teflon tape
- Replacement O-rings or seals (compatible with the SMWF 0.5)
- Silicone sealant (if necessary)
- Clean cloth or paper towels
- Bucket (to collect excess water)
- Isopropyl alcohol (for cleaning)
Step-by-Step Guide to Repairing a Leaking SMWF 0.5
1. Turn Off the Water Supply
Before attempting any repairs, shut off the water supply to prevent further leakage and water wastage. If the sensor is part of a larger system, isolate the specific section where it is installed.
2. Drain the System
Open the nearest faucet or valve to relieve pressure in the line and drain any remaining water. Place a bucket under the sensor to catch residual water.
3. Inspect the Sensor
Carefully examine the SMWF 0.5 sensor for visible signs of damage, such as cracks, loose fittings, or worn-out seals. Use a flashlight if necessary to check hard-to-see areas.
4. Disassemble the Sensor
Using an adjustable wrench or screwdriver, disconnect the sensor from the water lines. Be gentle to avoid causing additional damage. Place the removed parts on a clean surface.
5. Clean the Components
Clean the sensor housing, fittings, and internal components with a soft cloth or paper towel. Use isopropyl alcohol to remove any debris, mineral deposits, or old sealant. Ensure all parts are dry before proceeding.
6. Replace Worn Seals or O-Rings
Inspect the O-rings and seals for signs of wear, such as cracks or flattening. Replace any damaged components with new ones that are compatible with the SMWF 0.5. Apply a thin layer of silicone grease to the new seals to enhance their durability and ensure a watertight fit.
7. Check for Cracks and Apply Sealant
If the sensor housing has minor cracks, apply silicone sealant to the affected area. Allow it to cure as per the manufacturer’s instructions. For extensive damage, consider replacing the sensor entirely.
8. Reassemble the Sensor
Reattach the sensor to the water lines, ensuring all connections are aligned and secure. Wrap Teflon tape around the threaded fittings to enhance the seal and prevent leaks.
9. Test the Repair
Turn on the water supply slowly and check for leaks. Observe the sensor while the system is running to ensure it operates correctly without any signs of leakage. If you detect further issues, repeat the inspection and repair process.
10. Regular Maintenance
To prevent future leaks, conduct regular maintenance on the SMWF 0.5 sensor. Clean the sensor periodically, inspect the seals, and ensure all connections remain tight. Avoid exposing the sensor to extreme conditions that could compromise its integrity.
When to Seek Professional Help
While the steps outlined above can resolve most minor leaks, there are instances where professional assistance may be necessary. If the sensor has extensive damage, or if you are unable to stop the leak despite repeated attempts, consult a licensed plumber or technician. Replacing the sensor may be more cost-effective than attempting to repair severe issues.
FAQs:
1. What causes a Water Flow Sensor SMWF 0.5 to leak?
A leaking water flow sensor is typically caused by damaged seals, worn-out O-rings, or loose fittings. Over time, the sensor may experience wear due to constant exposure to water pressure, temperature fluctuations, or improper installation.
2. How do I identify a leak in the SMWF 0.5 sensor?
You can identify a leak by visually inspecting the sensor for signs of water around the sensor body or connections. Additionally, if you notice a decrease in water flow accuracy or pressure, it could indicate a slow leak.
3. What tools do I need to repair a leaking Water Flow Sensor SMWF 0.5?
To repair a leaking SMWF 0.5 sensor, you will need the following tools:
- Adjustable wrench or pliers
- Replacement O-rings or seals (if necessary)
- Screwdriver (if the sensor has screws)
- Teflon tape or pipe sealant (optional)
- Cleaning cloth
4. Can I repair the Water Flow Sensor SMWF 0.5 myself?
Yes, with the right tools and replacement parts, most users can repair a leaking Water Flow Sensor SMWF 0.5 themselves. However, if you are unsure or the sensor is significantly damaged, it is recommended to seek assistance from a professional technician.
5. How do I replace the O-rings or seals on the Water Flow Sensor?
To replace the O-rings or seals, follow these steps:
- Turn off the water supply to avoid further leakage.
- Disconnect the sensor from the water supply lines.
- Use a wrench or pliers to remove the sensor from its housing.
- Inspect the O-rings for wear or damage, and replace them with new ones.
- Apply Teflon tape to the threaded connections (optional) to ensure a tight seal.
- Reassemble the sensor and reconnect it to the water supply lines.
- Turn the water supply back on and check for leaks.
Conclusion
Repairing a leaking water flow sensor, such as the SMWF 0.5, requires patience, attention to detail, and the right tools. By identifying the root cause of the leak and following a systematic approach, you can restore the sensor to optimal functionality and prevent further issues. Regular maintenance and proper installation practices are key to extending the lifespan of your sensor and ensuring your water system runs efficiently.